Project Devices
Project devices connect a base device to a project and add project-specific configuration such as display name, location, data frequency, connection settings, scheduled restart, and special alarms.
On This Screen
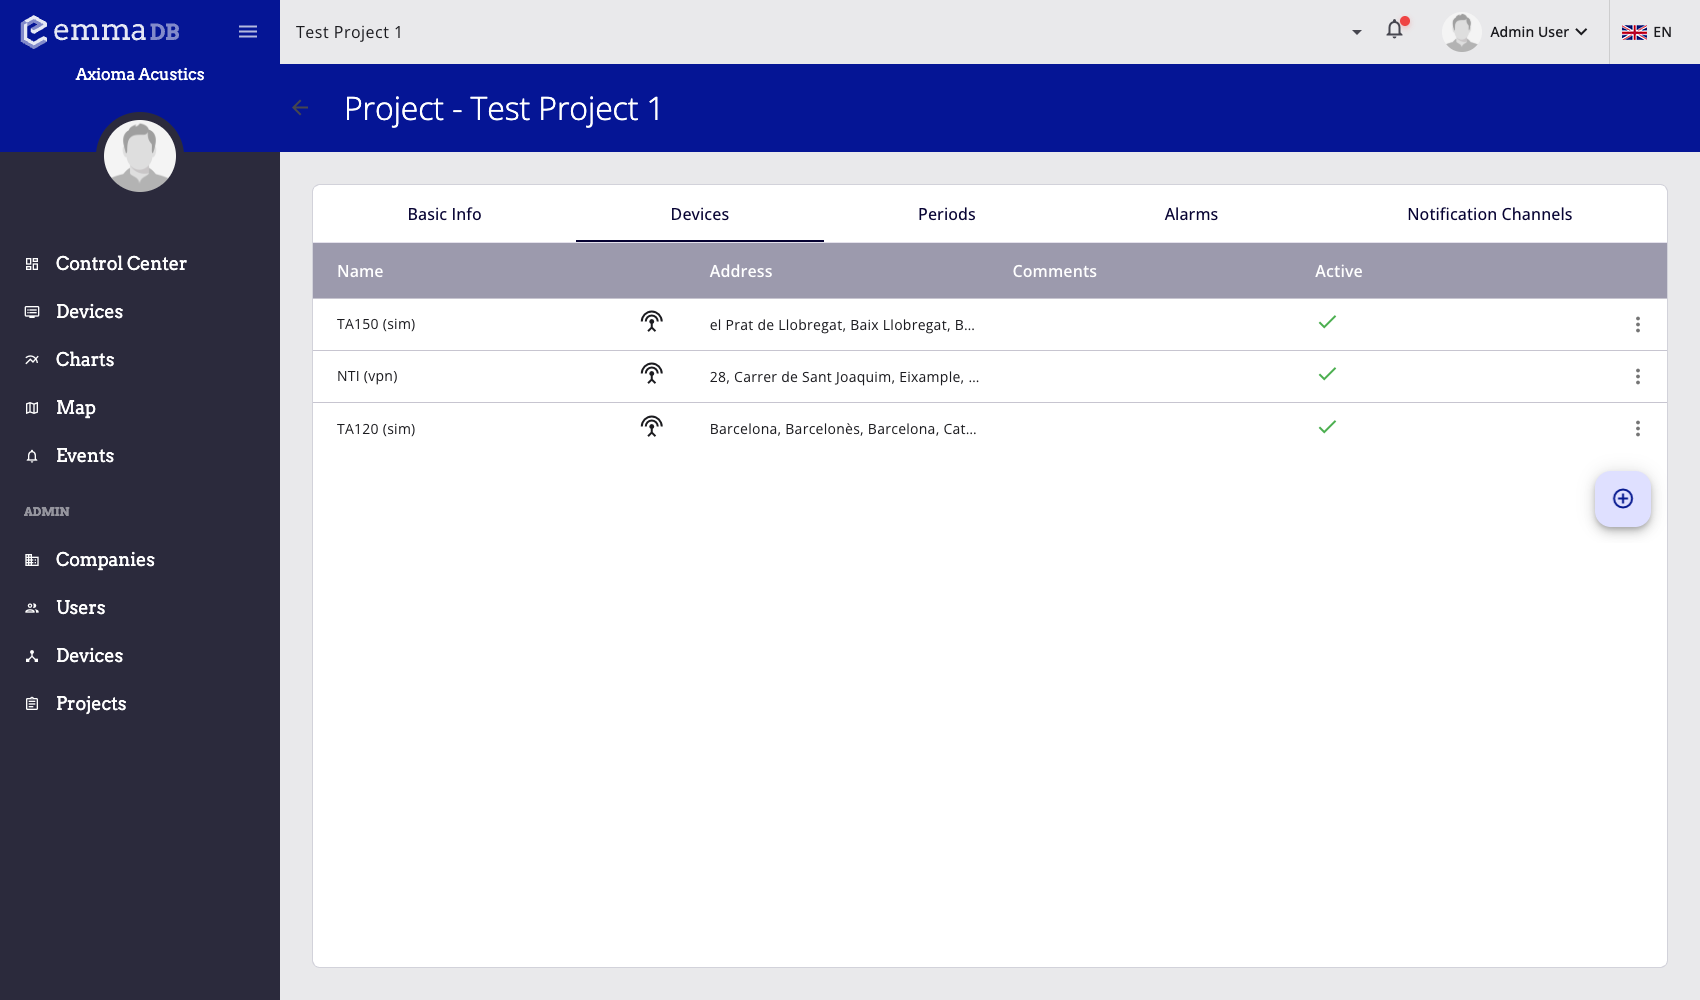
- Review the devices assigned to the project and their active state.
- Open a project device row to edit its project-specific configuration.
- Use the floating action button to add another device to the project.
Device List
The Devices tab lists the devices assigned to the project. Each row shows the project device name, device type icon, address, comments, and active state.
From the row menu, administrators can:
- Activate an inactive device so it starts participating in the project.
- Deactivate an active device before making changes that require the device to be stopped.
- Reset compatible devices, such as supported Svantek devices.
- Remove a device only when it is inactive.
Open a row to edit the project device. Use the floating + button to add a new project device.
Add a Device to a Project
- Open Administration > Projects.
- Select the project.
- Open Devices.
- Press the floating + button.
- Select the base device.
- Set the project-specific name and optional comments.
- Complete the required location and device-specific settings.
- Save the device.
The base device provides the physical device identity and model. The project device defines how that device is used in this project.
Device Info
The editor can include these fields:
- Base device selects the physical device and model.
- Name is the project-facing name shown in lists, dashboards, charts, maps, and events.
- Comments store operational notes for administrators.
- FTP folder appears for device types that import files from a project-specific folder.
- Custom data frequency overrides the default data frequency shown from the base device when needed.
- Picture uploads or removes the image used to identify the device.
Use a clear project device name. The same base device can be easier to recognize when the project name describes the installation point, not only the hardware model.
Location
The location section controls where the device appears in the map and in location-aware views.
- Enter an address and leave the field to search for coordinates.
- Click the map to place or adjust the marker.
- Edit latitude and longitude manually when exact coordinates are known.
If a device appears in the wrong place on the map, correct the project-device location here.
Device-Specific Configuration
Some device models expose additional settings:
- LF010 devices can map fixed device periods to project periods. This mapping is used when LF010 limits need to follow the project's period model.
- Svantek devices can show custom configuration, optional recording settings, raw configuration preview, and scheduled restart options.
- NTi XL3 devices can show connection type, host or connect key, password, and storage settings.
Some fields are locked while a device is active. Deactivate the device first when the editor indicates that a setting cannot be changed while active.
Scheduled Restart
Supported devices can be configured to restart on a schedule:
- enable or disable scheduled restart
- choose weekly or monthly frequency
- select weekday or month day
- set hour and minute
The schedule uses the project timezone shown in the editor.
Special Alarms
Special alarms are configured from the project-device editor, not from the standard alarm table.
- Connection alarm notifies when the device goes offline or comes back online.
- Power-supply alarm notifies when the device is unplugged or plugged back in.
- Notification channels selects which project notification channels receive those alerts.
Use these alarms for device health monitoring. Use project alarms or device alarms for thresholds based on measured data fields.