Project Periods
Project periods define named time ranges inside a 24-hour day. They are reused by project alarms and by device settings that need different behavior by schedule.
On This Screen
- Use the timeline to review period coverage across the full day.
- Review saved periods and their intervals in the table.
- Edit, delete, or add period intervals from the available actions.
Timeline
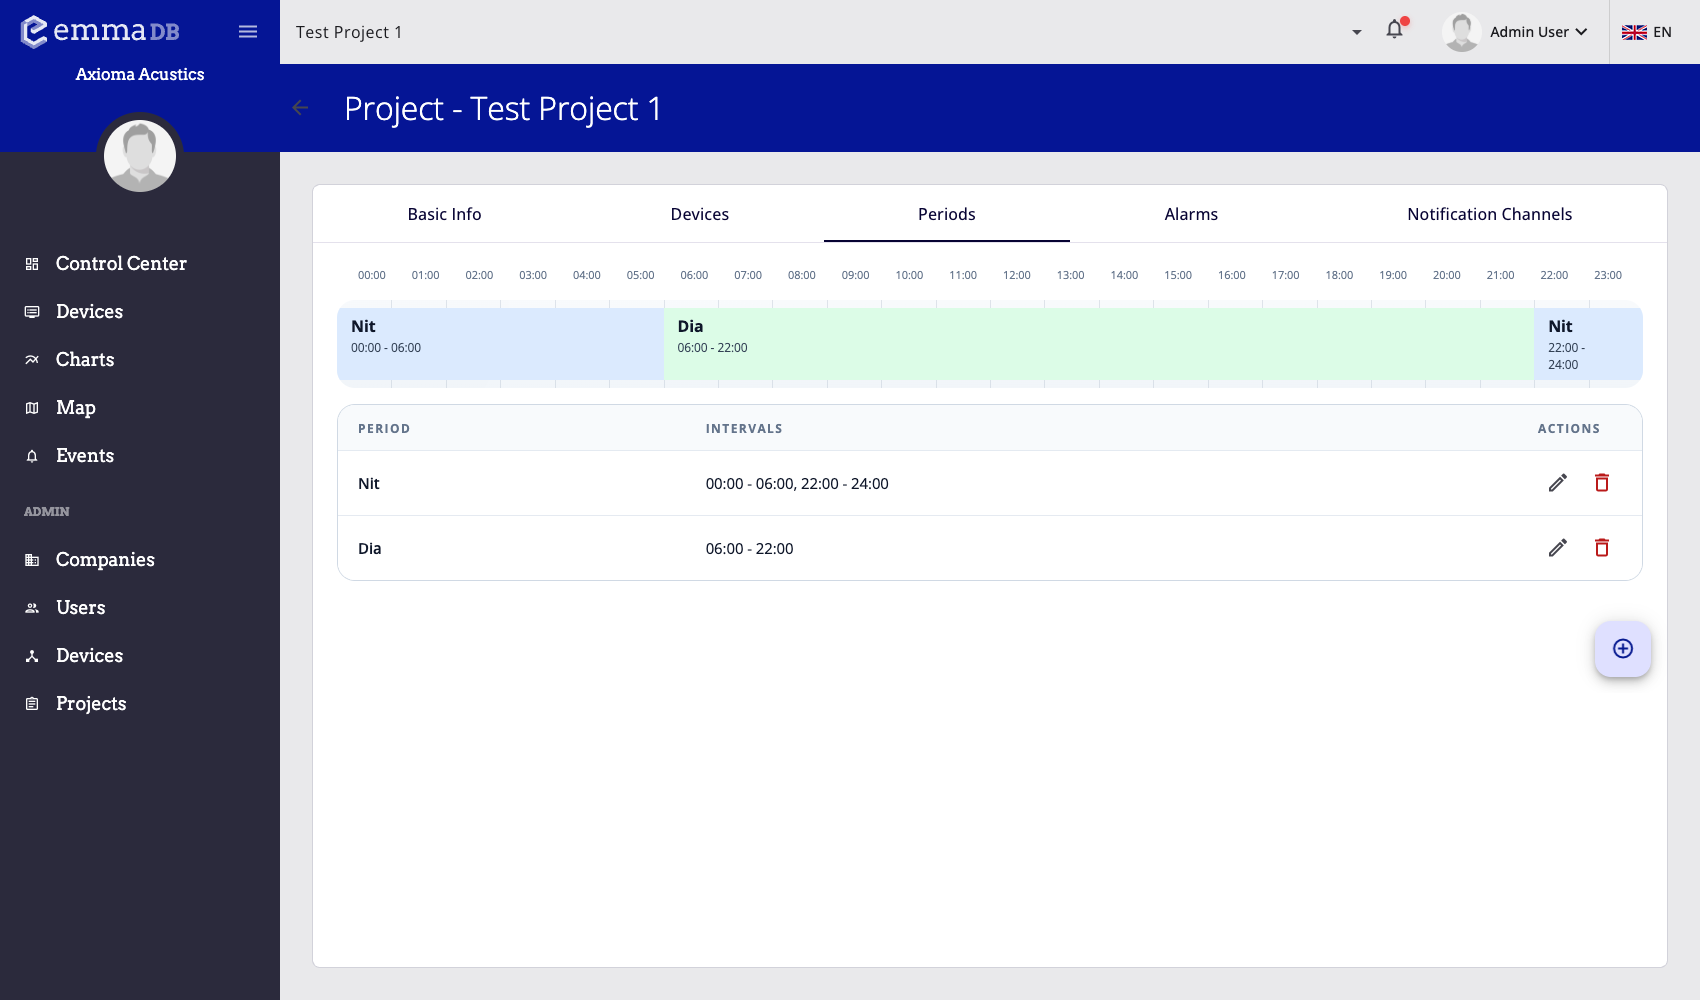
The Periods tab shows a visual 24-hour timeline:
- hour markers show the full day
- colored segments show configured periods
- hover guides help locate split points
- segment actions allow editing or deleting saved periods
- the table below the timeline lists each period and its intervals
If no periods exist, the page prompts administrators to create the first one.
Add a Period
- Open Administration > Projects.
- Select the project.
- Open Periods.
- Press the floating + button.
- Enter the period name.
- Add one or more intervals.
- Save the period.
Each interval has a start time and an end time. Use multiple intervals when the same period name applies to separate parts of the day.
Edit Intervals
When editing a period, administrators can:
- rename the period
- add an interval
- change start and end time
- remove an interval when more than one exists
- save once the validation message is clear
Avoid overlapping periods unless the project workflow intentionally depends on overlapping schedules. Clear period names make alarm limits easier to audit.
How Periods Are Used
Project periods are used by:
- project alarms with period-specific limits
- LF010 period mapping in project devices
- operational review of time-based behavior
When a project alarm uses period limits, the threshold can change depending on the active period. Configure periods before creating those alarm rules.